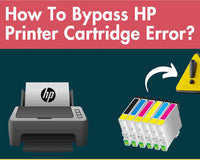
On occasion, you might experience HP ink cartridges-related issues on your HP inkjet indicated by an error message on the printer control panel or printer software. The error message might state that the cartridge is incompatible, missing, or that there has been a failure. This blog will give you a detailed introduction to the causes of ink cartridge problems and provide you with solutions on how to bypass HP printer ink cartridge errors, helping you to solve ink cartridge problems easily.
Causes Of HP Cartridge Problem
Several factors can cause ink cartridge issues in your HP printer. Understanding these root causes is critical to implementing targeted solutions to resolve the problem effectively. Here are some of the most common reasons behind HP cartridge problems:
1. Wrong ink cartridge model: Using an ink cartridge that does not match the printer model will result in an ink cartridge error message warning.
2. Ink Cartridge Installation: Improper installation of ink cartridges may hinder the printer's functionality, resulting in error messages and print quality issues. Keeping your ink cartridges secure and installed correctly is critical to the seamless operation of your printer.
3. Damage to the cartridge: Physical damage to the cartridge, such as cracks or leaks, may affect its performance and trigger cartridge-related errors. These problems can be exacerbated by improper handling of ink cartridges or the use of damaged ink cartridges.
4. Ink cartridge levels: Low ink levels or dry ink may cause poor print quality and error messages, indicating problems with the HP ink cartridges. Monitoring ink levels and promptly replacing depleted ink cartridges is critical to maintaining consistent printing performance.
How To Bypass HP Printer Cartridge Error?
Step 1 Check The Ink Cartridge Numbers
Making sure the cartridge model numbers match your printer determines whether they are compatible or not. Here are some steps:
1. Open the door or lid to the cartridge access area.
2. Wait until the ink cartridge stops moving before continuing.
3. Look at the cartridge labels and make a note of the number listed on them. (such as HP OfficeJet Pro 8010)
4. To check if your cartridge is correct for the printer, go to support.hp.com.
5. Select printer support.
6. Under HP Toner & Cartridges, select Check Compatible Cartridges.
7. Search for and select your printer models in the search field. (such as HP OfficeJet Pro 8010)
8. All compatible ink cartridges for your printer model are displayed in the dropdown menus.
9. If the cartridges in your printer do not match any of the numbers in the list, replace the incompatible cartridges with one of the numbers listed.
Note: These steps only apply to standard ink cartridges. If you are an Instant Ink subscriber, you may not be able to find your cartridge model number using the method above.
Step 2 Reset The Printer
Resetting the printer can recover it from cartridge errors or failures.
1. With the printer turned on, disconnect the power cord from the printer.
2. Unplug the power cord from the power source.
3. Wait 60 seconds.
4. Reconnect the power cord to a wall outlet and the printer.
Note: HP recommends plugging the printer directly into a wall outlet.
5. Turn the printer on to complete the reset.
Step 3 Clean The Ink Cartridge And Cartridge Electrical Contacts
Removing any debris or buildup from the contacts on the cartridge and the cartridge can fix ink errors.
1. To clean the ink cartridge, you will need a lint free cloth.
2. Open the door or lid to the cartridge access area.
3. Wait until the cartridge stops moving.
4. Remove the cartridge from the cartridge. Some cartridges slide directly out of their slots, some have a tab that needs to be pressed to be removed, and some cartridges need to be gently pressed down before they can be removed.
Caution: Do not touch the ink nozzles or the copper-colored electrical strip on the cartridge.
5. Touching or trying to remove these parts can result in clogs, ink failure, and bad electrical connections.
6. Occasionally, protective tape can be left on the cartridges when they are installed. If you see this tape on the cartridge, remove it, reinsert the cartridge, and try to print again. If no protective tape is seen on the cartridge, continue with the cleaning procedure.
7. Using the lint-free cloth, gently wipe the copper-colored contacts on the cartridge.
8. Do the same to clean the electrical contacts in the cartridge.
9. Close the door or lid to the cartridge access area.
Step 4 Replace The Problem Ink Cartridge.
If the current ink cartridge in your printer is defective, installing a new cartridge can resolve ink-related errors.
1. Obtain replacement cartridges before removing the current cartridges.
If you are using compatible ink cartridges, it is important to choose a reliable brand like True Image. True Image is committed to providing users with cost-effective ink cartridges and toner cartridges, such as the HP 912 ink cartridge for the HP OfficeJet Pro 8010 printer.
If you are an Instant Ink subscriber, visit instantink.com and log in to contact HP Instant Ink Support to obtain a new cartridge. Instant Ink subscribers have the right to replace ink cartridges through the service.
2. Open the door or lid to the cartridge access area. Wait until the cartridge stops moving.
3. Remove the cartridge indicated in the error message, and then insert the new cartridge into the slot. Close the door or lid to the cartridge access area. Depending on your printer model, you might receive a prompt to align the cartridges after replacement.
4. Follow the steps in the prompt to complete the alignment.
Step 5 Disable HP Cartridge Protection
If none of the above works, the problem may be related to "Cartridge Protection" in HP firmware, which attempts to ensure that printer owners only use name-brand HP replacements. Fortunately, cartridge protection can be turned off, which may solve the problem. Here are the steps:
1. Access printer settings:
On the printer's display screen, navigate to the "Setup" menu. This can usually be found by clicking on the gear icon on the touch screen.
2. Open printer preferences:
From the "Setup" menu, find "System Setup" and click on it.
3. Find ink cartridge settings:
In the "System Setup" section, scroll down to find "Supply Settings" and click on it.
If you find the "Cartridge Policy" setting, select it and then choose the "Off" option. This will turn off the feature that prevents the printer from using non-HP ink cartridges.
4. Disable ink cartridge protection:
Click on the return button on the printer screen, and under "Supply Settings", there is a column with "Cartridge Protection". Please select it and then select the "Off" option.
5. Save changes and exit:
After turning off cartridge protection, make sure to save the changes (if prompted) and exit the menu.
How To Avoid HP Printer Ink Problems?
To keep your HP printer functioning optimally, routine maintenance is critical. First of all, remember to clean the printer regularly, including parts such as the casing and nozzle, and wipe it gently with a lint-free cloth to avoid dust and dirt accumulation. Secondly, use high-quality ink cartridges and paper to ensure print quality and extend the life of the printer. If you are looking for a high-quality and cost-effective ink cartridge brand, then come to True Image. Here, you will definitely find ink cartridges and toner cartridges that satisfy you. Furthermore, avoid frequently turning the printer on and off, follow the printer instructions for correct operation and maintenance, and do not disassemble or repair at will to avoid damaging the printer.


